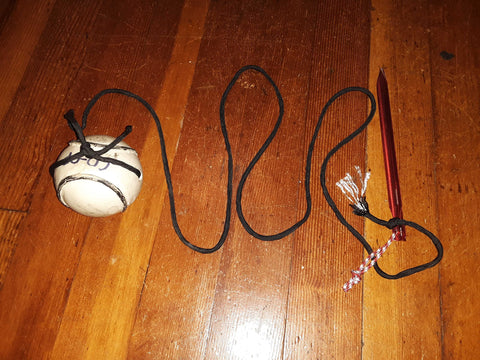
If you’ve been following USHSC’s content for a while now, you know we’re all about that DIY ethic and finding the most affordable way for all us amateurs to enjoy, play, and practice the sport we love. Along those lines, we thought it’d be helpful to put out a “How To” for making a groundstrike trainer. This handy contraption is perfect for personal or club use.
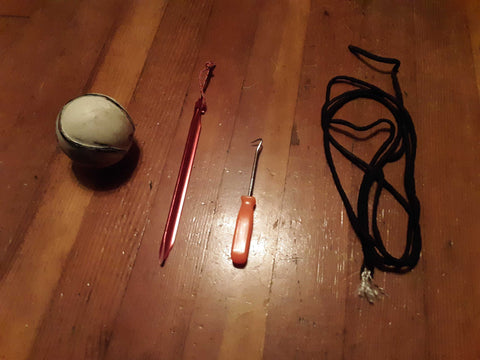
For each groundstrike trainer, you’ll need:
Materials:
- 1 Wall Ball
- 1 Tent Stake (MSR Groundhogs recommended as they don’t bend as easily as cheap stakes)
- Length of Paracord (4-6ft. Recommended)
Tools:
- Drill Press (Handheld Drill can work, but requires more safety considerations)
- 3/8th” to 1/2" Drill Bit
- Channel Locks, Clamp, or similar “gripping tool”
- Pick, Coat Hanger or similarly stiff wire
- Gloves (Optional)
1.
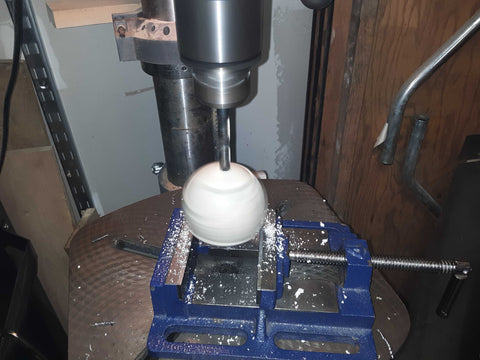
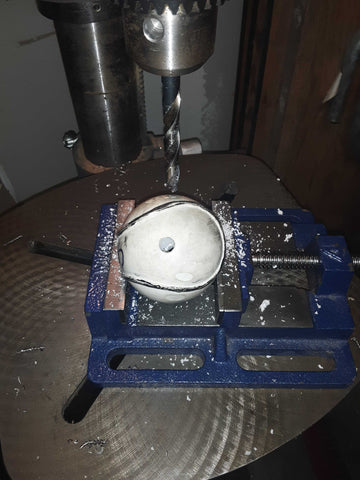
Take the wall ball over to the drill press - hopefully, you, a clubmate, or someone you know has one. Using the channel locks, clamp, or similar “gripping tool” to be safe, hold the wall ball and drill straight through it.

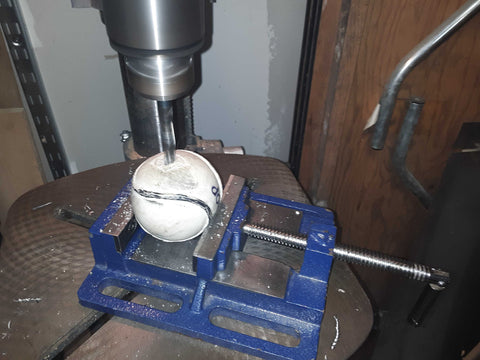
Fair Warning: As you can see above, the ball may still get pulled out of your gripping tool as you extract the bit. Be safe when using power tools.
It is possible to do this with a handheld drill, but please take appropriate safety precautions as there will be more things to hold steady; the fewer wobbly elements around power tools, the better. For example, a table-secured vice could be used to hold the wall ball in place for the handheld drill scenario.
Step 1 is the trickiest part of the operation and requires the most care and safety concern. This is partly due to the fact that the wall ball’s composition makes it more likely to compress as you attempt to drill it - that’s part of what makes them so suitably bouncy for their primary purpose. Once the wall ball has been drilled through, the rest is easy.
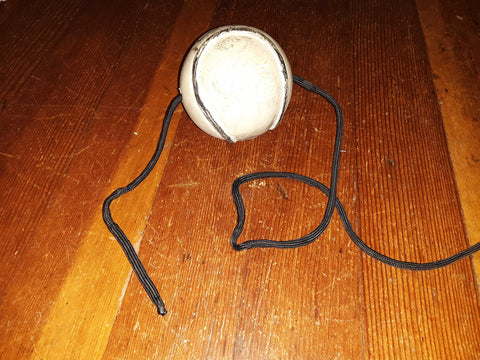
2.
Run the length of paracord through the drilled hole in the wall ball. This may require assistance from a pick, coat hanger, or stiff wire to push it all the way through.

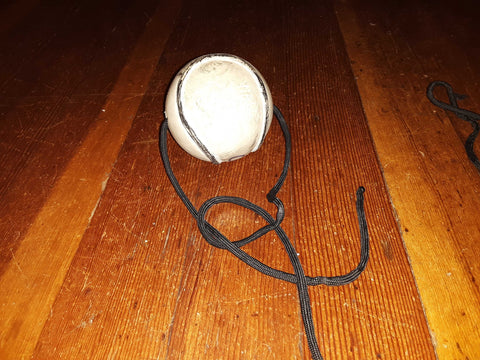
3.
Tie a bowline with the paracord. Don’t know the bowline? Time to learn one of life’s most useful knots!
A. With the right end of the paracord, make a loop in a backwards “P”, with the trailing end of the rope underneath the loop.
B. Take the left end (“the rabbit”) and run it up through the “P” (“the rabbit’s hole”).
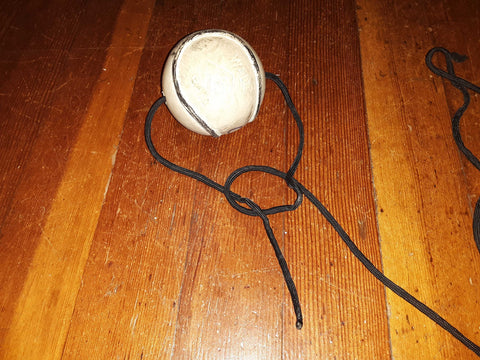
C. Continue with the left end ("the rabbit") around the underside of the trailing end (“the tree”).
D. Then, run “the rabbit” back through the “P” (into “the rabbit’s hole”) and pull tight.
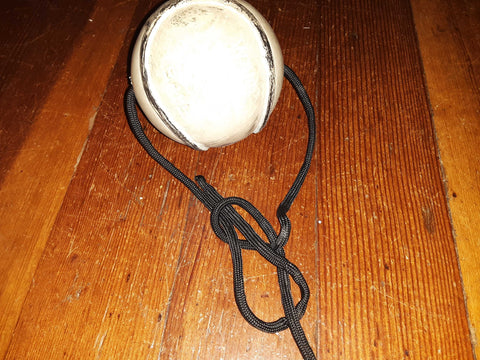
An easy way to remember the bowline is the rabbit runs out of its hole, around the tree and dives back into it’s hole. Once tied, the bowline sort of looks like a life vest/PFD.

4.
Taking the long end of the paracord, tie it to the tent stake. If the tent stake has a hole in it for the cord, you can tie another bowline. Alternatively, a clove hitch or square knot will work well.
5.
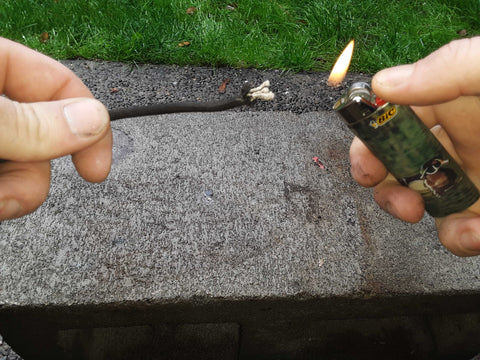
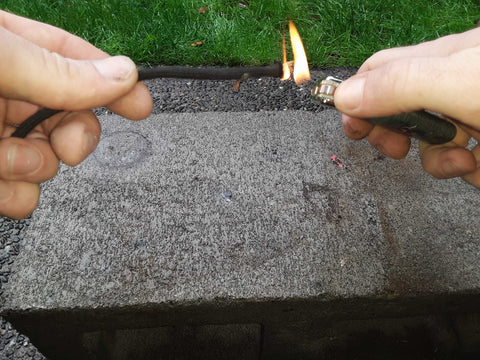
Now that the paracord is tied off, "fuse" the ends closed with a lighter or open flame. The end will likely have a flame you need to blow out like a candle once its successfully "fused". "Fusing" shrinks and seals the paracord to eliminate fraying.
It is strongly recommended that you "fuse" the paracord outside and over cardboard or another scrap surface. The smell is pretty awful and the paracord will drip extremely hot/molten material that can burn you or ruin good surfaces as it fuses.


6. Done! Head outside and test out your groundstrike trainer - just remember to watch your feet as the top of the stake can hurt a bit if you mistakenly step on it. Flat cones can be used to mark the stake.